The Works Cited page is where MLA format often goes wrong. Whether you're formatting a document in MS Word or using a formatting tool, getting the MLA 9 formatting details right makes your paper look polished and professional. Here's everything you need to know about MLA formatting.
Basic MLA 9 Format Page Setup
According to Purdue OWL and the MLA Handbook 9th Edition:
- The Works Cited begins on a new page after the essay text
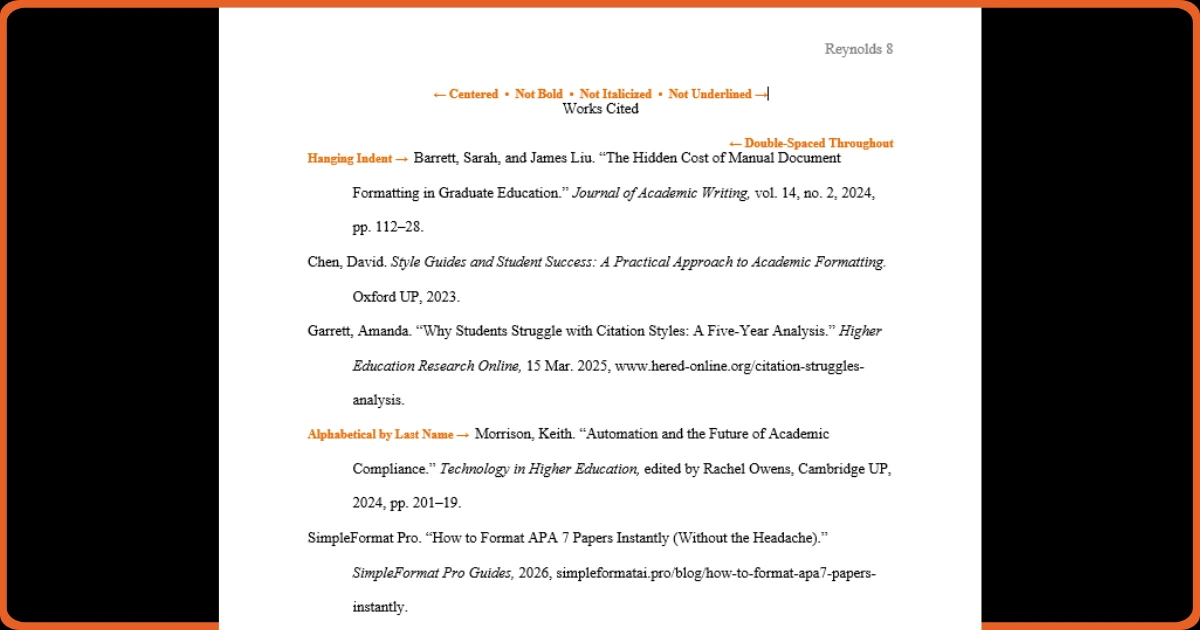
- "Works Cited" (or "Work Cited" for a single source) is centered at the top
- The heading is NOT bold, italicized, or underlined
- Leave a blank line before the first entry
- Use double-spacing throughout with no extra space between entries
The Hanging Indent
Each entry uses a hanging indent: the first line is flush left, and all subsequent lines are indented 0.5 inches. This is the opposite of regular paragraph indentation.
In Microsoft Word: Select entries → Paragraph → Special → Hanging
Alphabetization Rules
- Entries are alphabetized letter-by-letter by the author's last name
- For entries with no author, alphabetize by the first significant word of the title
- Ignore A, An, and The when alphabetizing titles
- Multiple works by the same author are ordered alphabetically by title
The MLA 9 Container System
MLA 9 uses a "container" system with nine core elements in order: Author, Title of Source, Title of Container, Other Contributors, Version, Number, Publisher, Publication Date, and Location.
Not every source has all elements—include what's available and relevant.
Ready to Format Your Document?
Stop fighting with margins and headings. Get a perfectly formatted paper in minutes.
Try SimpleFormat Pro Free →Skip Manual MLA Formatting
SimpleFormat Pro automatically creates a properly formatted MLA 9 Works Cited page with correct hanging indents and alphabetization. Just paste your references and let the software handle the MLA format requirements.